Being a university student probably means you don’t have a lot of extra change in your pocket. But that doesn’t mean you can’t look good.
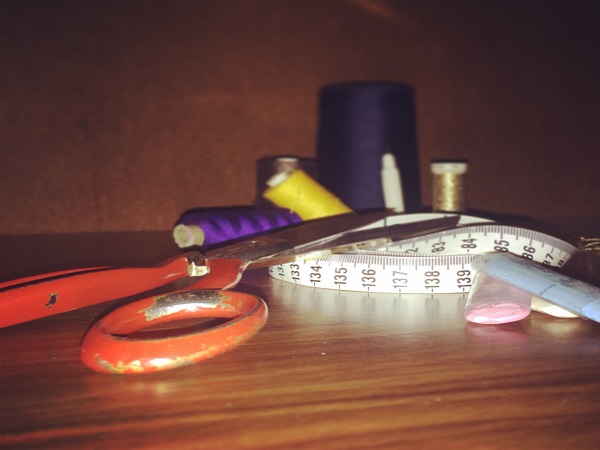
Here are some ideas that will keep your wardrobe feeling fresh that don’t require a degree in fashion design or advanced sewing abilities. All you need is a pair of scissors and some creative flare.
The Windsor cut:
Now I know what you’re thinking, “No, don’t cut the Windsor Smiths!”, but don’t worry, they’re just a cheap knock-off pair. So before the sun sets on your opportunity to wear open toed shoes, here’s a way to change them a little.
 What you’ll need: Your Windsors (if you dare) or a cheaper imitation and some scissors.
Step 1: Aim scissors as close as possible to the point where the vertical panel meets the sole of the shoe and cut.
Step 2: Cut the material that overlaps the four horizontal panels and the ankle strap.
Step 3: This step is optional and completely up to personal preference. You could choose to keep all the horizontal panels intact or cut off as many as you like.
Step 4: Using a permanent marker, colour in the material from the missing straps that are now exposed.
Picture above is one possible design option.
The upside-down effect:
This activity allows you to choose the shape of you neck-line and it’s also a great way to recycle your old clothing. As a lover of the off-the-shoulder top, I chose to have a wide neck line but you can make it as narrow as you like. It can be achieved with regular black leggings or a printed pair that might have looked good in the store, but not in front of your mirror at home.
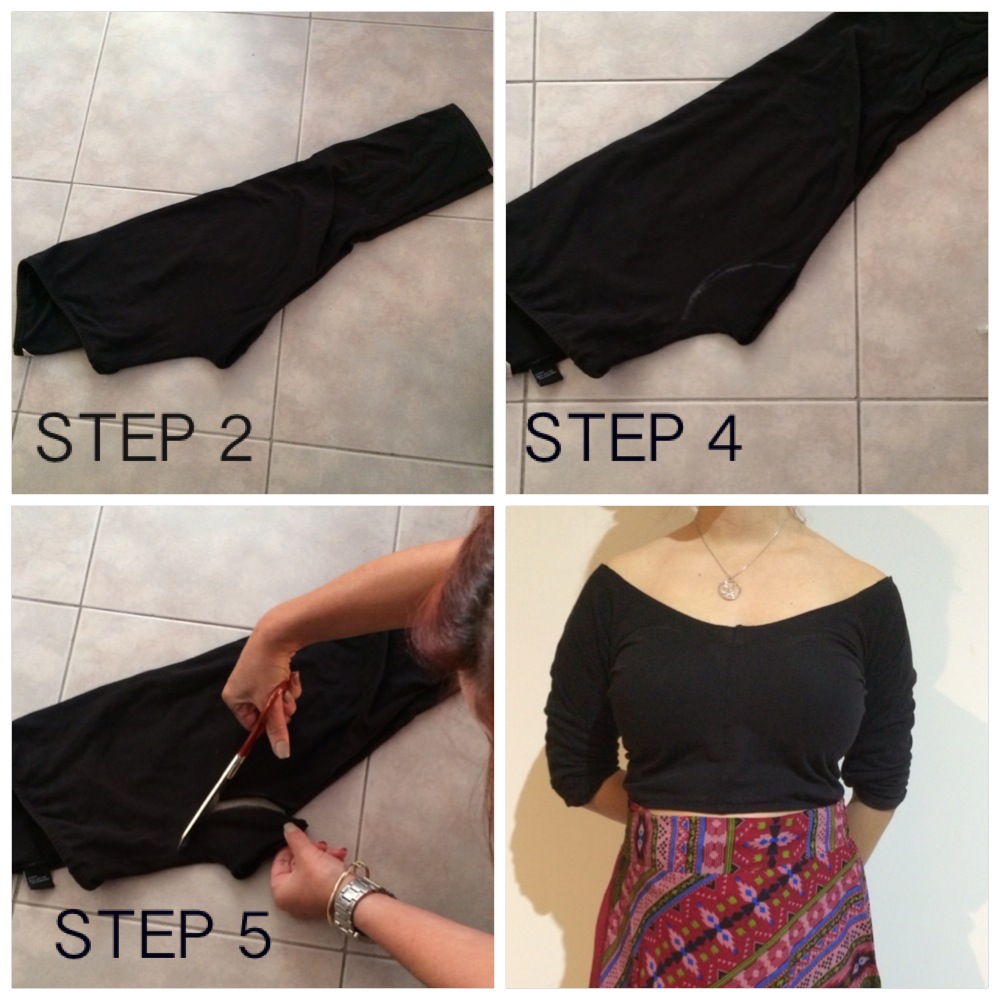
What you’ll need: Leggings, scissors, chalk or a bar of soap and a ruler.
Step 1: Remove all tags.
Step 2: Fold pants in half matching up the stitching on the inner part of the leg at the crotch.
Step 3: Using the crotch as the centre, mark a point on both sides that is equal distance from the centre, for example 5cm. (Note: the further out you go the larger the neck hole will be, if you’re unsure start smaller.)
Step 4: Draw a semi-circle using the chalk, or soap if you do not have any.
Step 5: Follow this line with your scissors and cut out the semi-circle. Using scissors, tidy the neckline if necessary.
When wearing, be sure to wear the backside at the front as it is longer and will allow for more coverage.
Now you’re invested:
I have a few too many blazers in my wardrobe so, inspired by Ted Baker, I decided to turn one into a vest. For this to work you will need a blazer that doesn’t have lining.
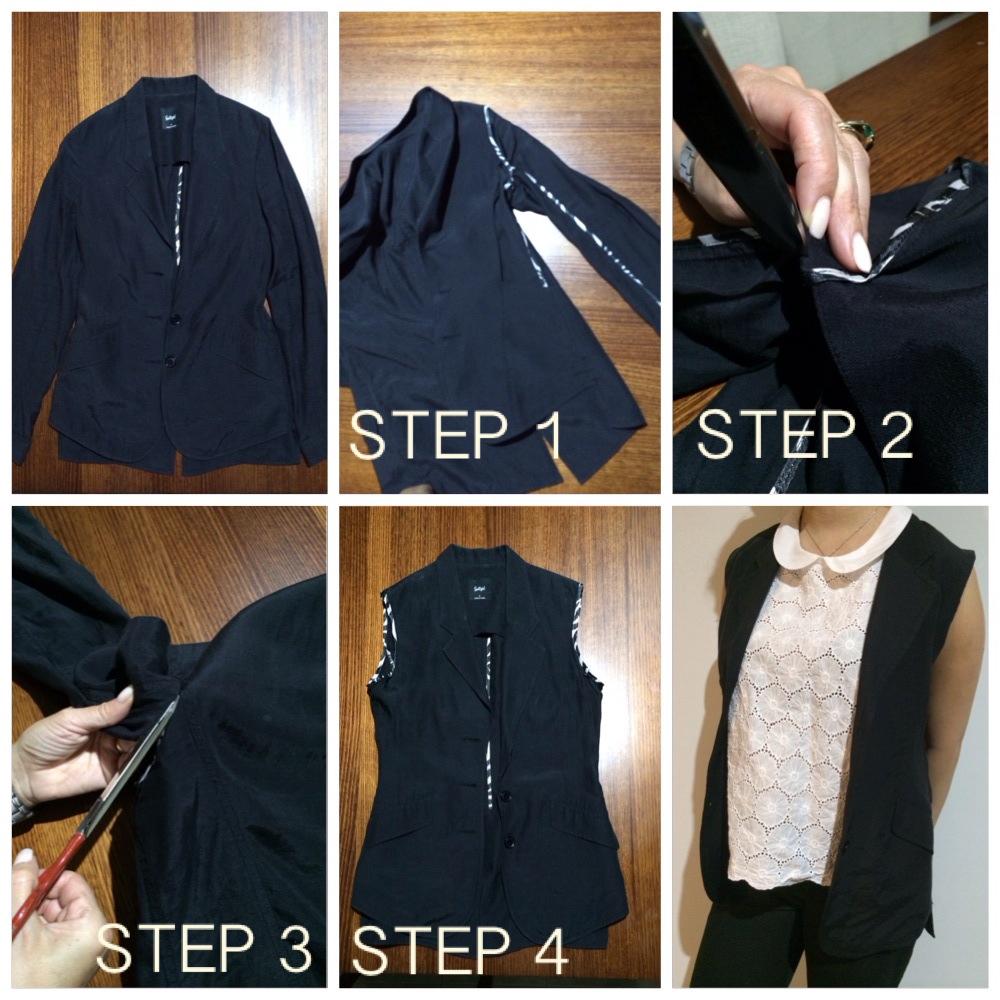
What you’ll need: Blazer without lining and some scissors.
Step 1: Turn the blazer inside out.
Step 2: Snip a hole under the arm, just outside the hem attaching the sleeve of the blazer to the body. In this case the hem is a zebra stripe pattern but it would usually be black.
Step 3: Turn blazer back the right way and begin cutting the sleeve off. Cut as close to the hem as possible.
Step 4: In this case the pattern of the hem requires you to iron it under unless you prefer to have the pattern showing. Usually having a black hem will mean you can wear it as is.
Dip Dye Hard:
The dip dye craze has moved south from your head to your clothes. You can dip dye any garment you like, including your top, skirt and even jacket. It works best on a white garment, but can be done on lighter coloured clothing as well. This activity will cost you the colour of the dye but you can pick it up for $8 at your nearest craft store.
![IMG_4422[1]](https://www.upstart.net.au/wp-content/uploads/2014/03/IMG_44221.jpg)
What you’ll need: A bucket or metal bowl, clothing dye, scissors, plastics bag, hair tie, rubber gloves, garment.
Step 1: Follow the directions on the dye packet to prepare dye.
Step 2: Cut handles off plastic bag.
Step 3: Cover the part you do not want to die with the plastic bag, making sure there aren’t any holes, and tightly tie the bag at the point where you want the dye to start.
Step 4: Place garment in bowl of dye, taking care to leave the plastic bag out.
Step 5: Leave for a minimum of 30 minutes or until desired colour is achieved.
Step 6: Taking the garment out, rinse under cold to warm water until the water runs clear. Machine-wash, dry and your new and improved outerwear is ready to rock and roll.
Here is another interesting take on dip-dying clothes.
So there you have it, four unique DIY activities that will help you save money as well as giving you new ways to procrastinate all of those assignments.

Lauren Colosimo is a third-year Bachelor of Journalism student at La Trobe University. Follow her on Twitter: @laurenacolosimo